


We decided to focus on the right cabinet first – we have plans for the other one (which mostly involve building/attaching cabinet doors) for the one on the left, but that can wait for the future.
Because first - we REALLY needed someplace to store all our glassware!
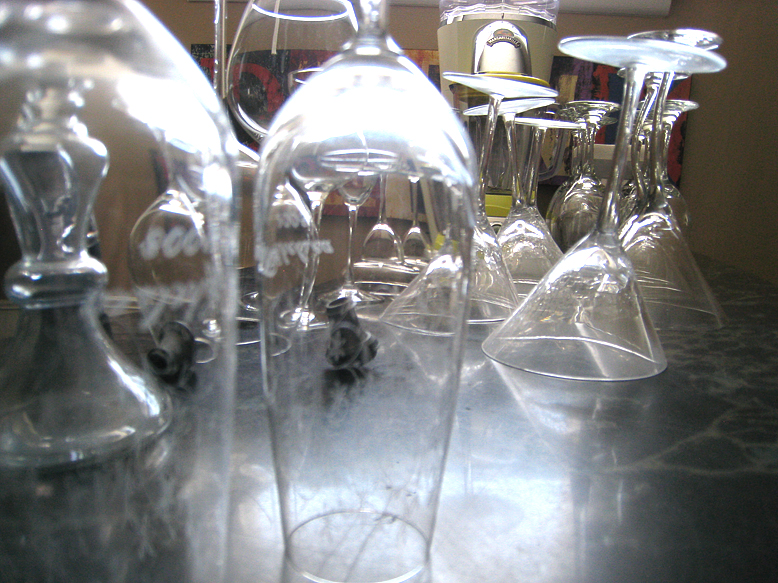
The plan was to add some pretty glass shelves to the right cabinet, which would come in handy because in most instances we’d be looking up through the shelves to snatch whichever glass we needed (since the cabinet is mounted at ceiling height), so the shelves themselves needed to be transparent.
Plus, I just LOVE glass shelves. There’s something just really classy about them, ya know?
The only downside is dusting them. Oh well, it’s worth it to me!
Anyways, we decided where we wanted the shelves mounted and measured. And surprise, surprise, the cabinet was warped. Where were we going to find stock glass shelves that would fit?
Nowhere. Not that we looked that hard, honestly. But once we saw the measurements we knew that there was pretty much no way we would ever find something pre-made that would fit (each shelf needed to be a different size).
It was time to customize!
We called around and got a quote from a glass shop down the street, and they told us it would be around $30 per shelf, for a thick piece of tempered glass with beveled edges.
We were sold.
Then it was time to prep the cabin - ugh. Wait a minute…
What are we going to do about THAT? That random piece of wood over on the right side?!
Honestly, it wasn’t that big of a deal. But it really BOTHERED me. It was one of those things that I would see and cringe at, every.single.time. It HAD to go. It didn’t matter that nobody else would probably even see it – I couldn’t STAND that random piece of wood! The back of a cabinet should be level and flush, not have random beams of wood going across it! So, it had to go.
The only problem – it was supporting the right side of the cabinet. Typical.
Our solution: add to it.
We ran out to Lowe’s and picked up a couple pieces of wood that were the right thickness and about the right size, and then Tom got to work.

Once he had cut down the wood and screwed it into the wall, it was my turn.


A little wood putty…

Sanding….

Caulking…

Primer and some paint...
And we had a decently normal looking cabinet! Yay!
And then it was time for the shelves.
Tom got to work re-measuring (if we had thought about it, we would've written our original measurements down, since I ended up painting right over the marks we already made) and leveling.


He drilled a few holes to match the shelf supports we bought...

And we popped those shelf supports in and slid in the fancy new glass shelves!

And then we put up our glassware. And let me tell you - those glass shelves make a HUGE difference! Our basement has never looked so classy!


Maybe someday we'll do something fun like painting the back of the inside of the cabinet, or adding lights, or hey - even hiding that little surround sound cord in the top right of the cabinet. But for now, we're 110% happy with how the new shelves look, and of course couldn't be more pleased to finally have somewhere to put all our glassware (especially somewhere that's high and out of the reach of future little fingers!).
What do you think? Are you a fan of glass shelves? Are there any cabinets in your home that could use a little sprucing up?

Did you enjoy this post? Please subscribe for free updates in the future and to see what we're up to next!


Bellisimo! Spell check wants me to change that to bellicose, but I'm not going to. Anyway, as a fellow glassware hoarder, I think it looks great, and the shelves add an extra bit of sparkle. Perfect choice.
ReplyDeleteHave you considered an old window as a door for the other cabinet? Then fit wouldn't be as much of an issue with an obviously upcycled piece.